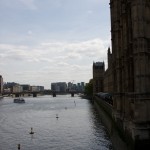
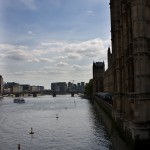
We had a trip to London over the bank holiday weekend, and I’ve been using some of the simpler methods available in PhotoShop [Elements] to make the images a little more punchy. Previously I’d been using layers to adjust the contrast in a specific area of the picture, but I found an online tutorial which uses a much simpler approach: select, feather and then use CMD [Mac] or CTRL [PC] and ‘L’ to bring up the levels editor. The results are quite dramatic. The first image is straight out of the camera:
The next is the same shot but with the levels adjustment:
I’ve actually used three of separate selections: before I worked on the sky I lightened the parliament building, with quite a low feather setting. Then I did two separate selections on the sky: the first was everything, which I darkened. At this stage it looked a lot better, but the lower half, where the clouds are quite packed, was still a little light, so I pushed this a bit more with a final selection.
I’ve taken a couple of bites to get this as it appears in the second shot. The first attempt was creating a halo around the building, where I was doing the lightening with too high a feathering. The top of the futhest tower of the parliament building is caught in the crossfire of the darkening, but I think the overall result is quite pleasing. There’s not really enough happening, especially in the foreground, to make it a terribly interesting shot, but the takeaway is that I’m going to add this to the list of techniques I’ll routinely apply to my outdoor shots.


Nice ! :).. Thanks buddy..