I guess when The Beeb and Attenborough have made a series about a country, it’s a pretty safe bet that it’s going to be a humdinger of a place to visit. We got back from Madagascar on Friday afternoon, our tenth outing with the same company we’ve been using for all our long haul travel. I’ll cut to the chase: it was fabulous.
By the numbers:
- Photos taken 1466 [me] and 683 [my wife]
- Of which, keepers: lots. Seriously, if you can’t manage to get memorable pictures in Madagascar, it’s time to give up.
- Kilometres covered by car: 1500.
- Species of lemurs seen: 14.
- Weight lost through illness: about 2kg.
I’ll start with that last point. Clearly, I upset some pagan poo gods by judging the phantom shitter on our Belize trip so harshly. I had the most sustained period of travel sickness that I’ve experienced to date. I only missed a day, but was under the weather from the third day and for about a week. My wife came down with it as well, but didn’t have it for quite as long as me. I jokingly put her stronger constitution down to her less literal enforcement of food best-before dates than me.
There were a couple of options for getting to Antananarivo [which, sympathetic to the world shortage in letter Ns, everyone calls Tana] but we ended up going via Paris. We had an overnight stay in a hotel about 10 minutes drive from the airport. The airport itself is pretty hectic: be prepared for enterprising ‘porters’ to descend on you and try to grab your luggage out of your hands – probably before you have any cash. While I think of it: there isn’t a great selection in duty free if you’re looking to get something last minute on the way back. It’s a similar sort of fare that you see in hotel shops. Oh, and if you’re transiting, be prepared to pay extra for a plastic bag that they staple shut for you – something I’d never come across before. As the 1 Euro represented 12% of the cost of the bottle of rum I was thinking about getting, I decided to skip.
Back to the itinerary. The next day we had two consecutive flights on the same plane – another first for us. First stop was Taolagnaro, and then we went straight on to Tulear, which is in the far south west corner of the country. We’d been warned by the travel company that there was a reasonable chance that our bags wouldn’t make the trip with us into Tana, and then that the internal flights might be rescheduled at short notice. Everything went really smoothly – in fact, the same could be said for the entire holiday. Every long haul trip we’ve had something has gone wrong. This was the first that the entire itinerary worked as planned.
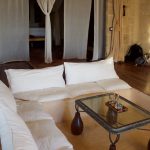
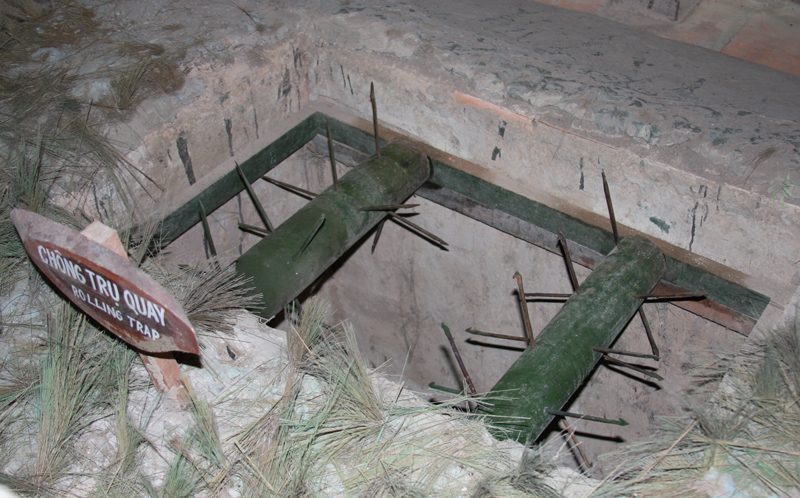
We met our driver and guide for the rest of the holiday at Tulear [Yves and La La] who drove us to our next accommodation, called the Hotel Bakuba. It was a lovely place, something of an ongoing art project for the guy who runs it. That said, some of the features had practicality a little lower down the running order. Our room had a sunken seating area with a glass table in it, which I don’t think was really catering for the guest who might decide that a dozen postprandial Jager bombs are a good idea. It immediately made me think of
this.
Mantrap
There was also a table with wildly splayed legs that we both stubbed our toes on every time we walked past it.
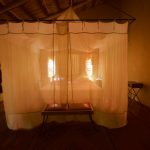
Fancy bed
It was undeniably top drawer accommodation but I couldn’t quite shake the sort of vibe you get in a bed and breakfast, because the couple who run it live there: you half-feel like you’re intruding when they are having dinner.
During our two night stay there we had a couple of outings, first to a spot called the Antsokay Arboretum, which was right next to the hotel, and then the Reniala forest. The Arboretum was an interesting enough hour but is really more for the gardening geek. Reniala gets you up close and personal to baobabs, which are fascinating.
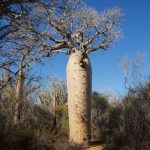
baobab
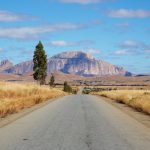
From Tulear, we transferred to Isalo, and our next hotel, the Relais de la Reine, where we stayed for 3 nights. This, again, was pretty fancy: just the way the itinerary played out we had a gradual decrease in snazziness of accommodation.
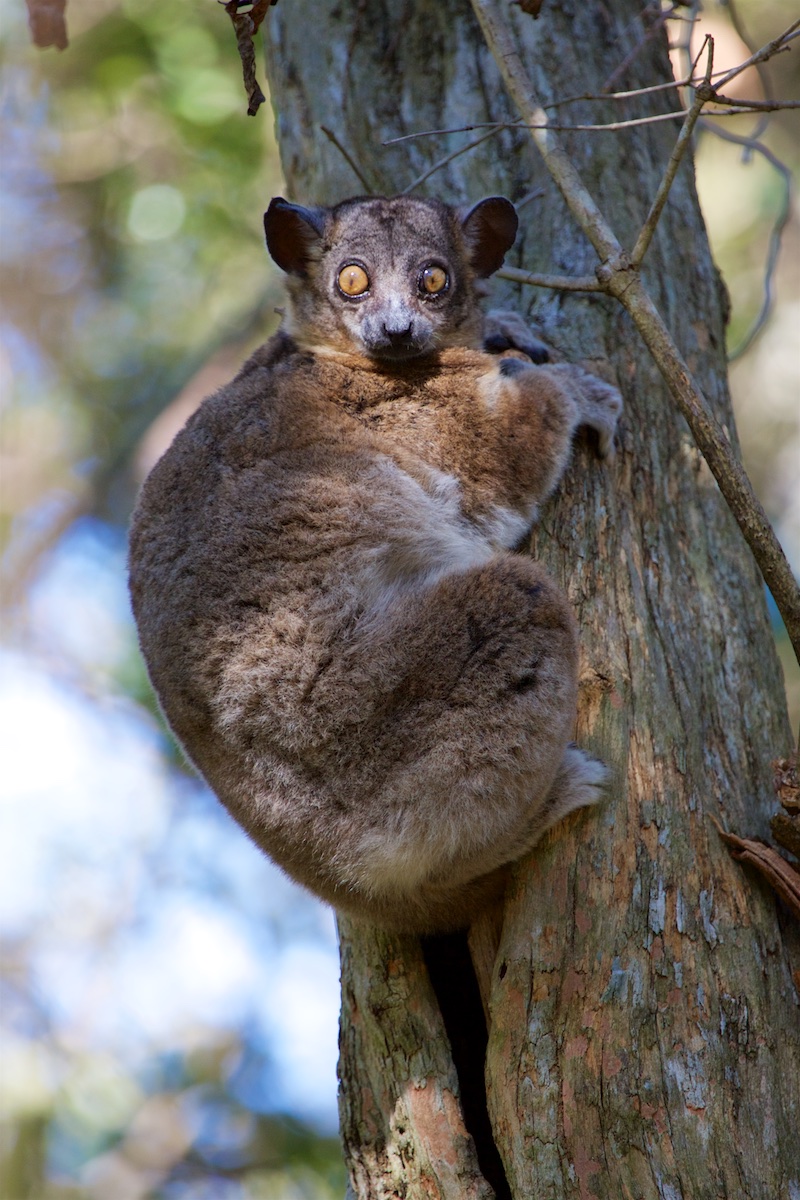
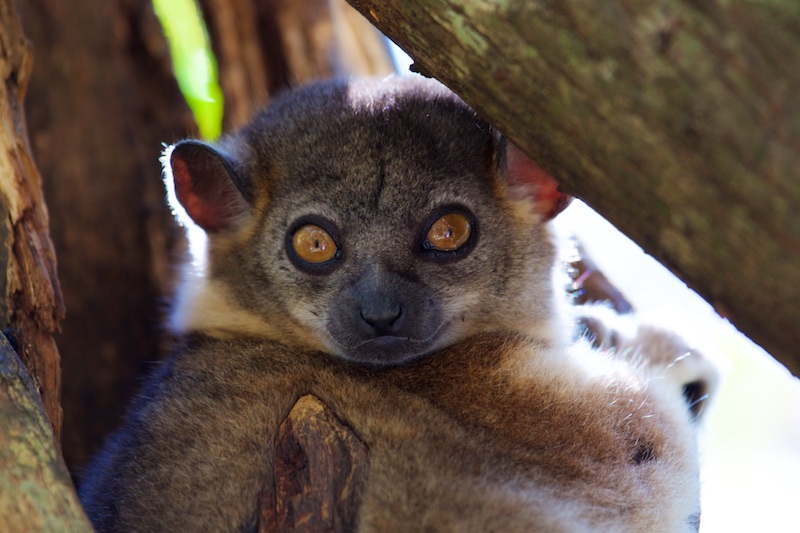
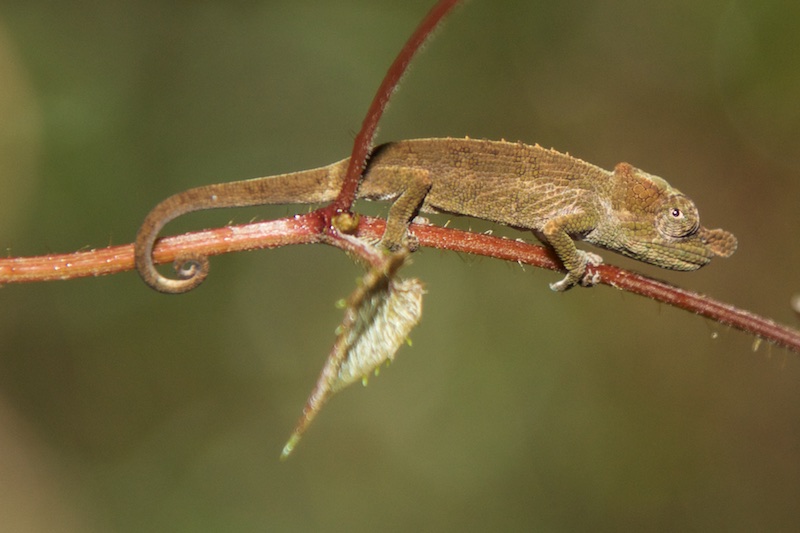
It was in the Isalo national park that we had our first encounter with lemurs, specifically this little fella:
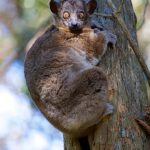
Hubbard’s sportive lemur
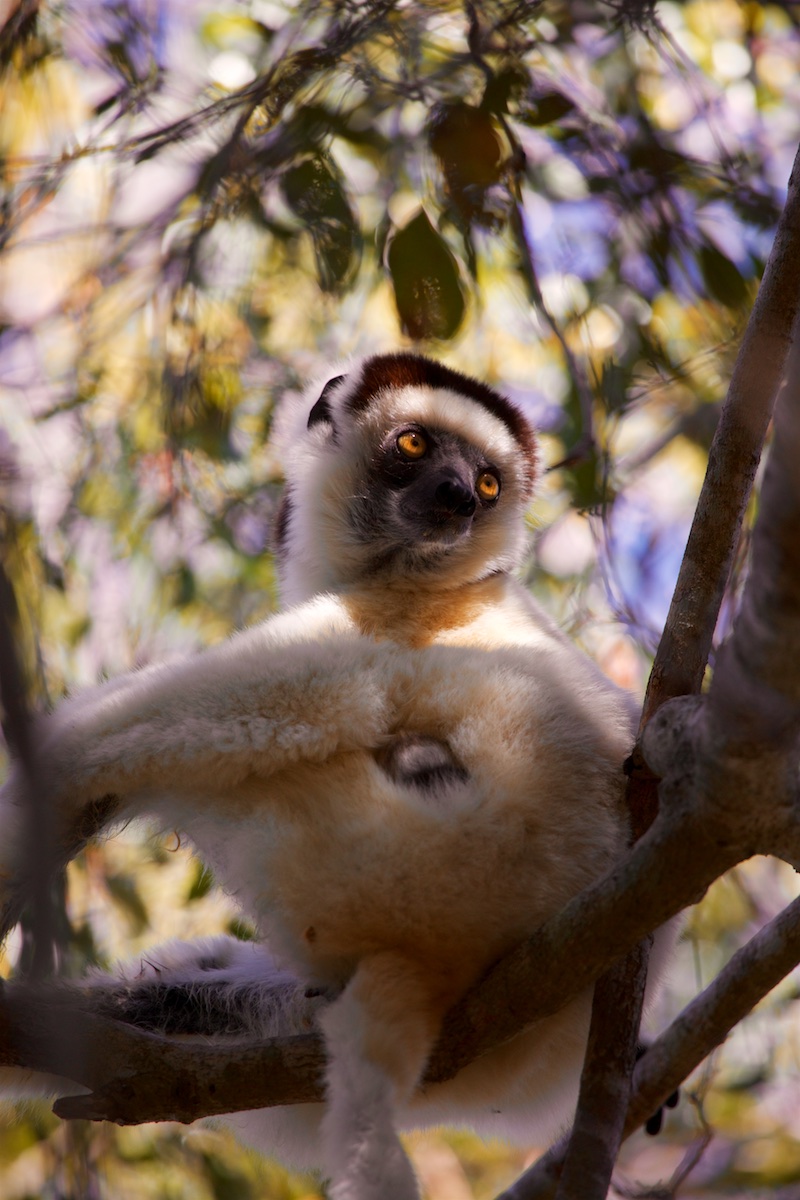
Isalo is also one of your best chances to see sifakas doing their hoppity run along the ground – which brings me to another point. Travelling as we did at the start of July meant that we were right at the start of ‘shoulder season’ [which I’d never heard of before this trip]. It’s mid winter, so the animals are less active than pretty much any other time of the year. However, it also meant that the numbers of tourists around were very low. Probably the busiest of the parks that we went to was Ranomafana, where sightings are co-ordinated among the spotters and guides and so groups of people will coalesce when something interesting happens. I guess at one point we were up to about 15. Our guide said that during the high season, people are tripping over one another. We were told that the sifakas are most likely to hit the ground running in September to October but, given the propensity for the same ground to be covered with people, you’re extremely unlikely to see it.
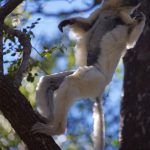
Sifaka
The little bundle under this mum’s elbow is an infant:
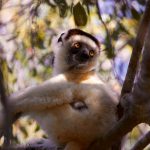
Sifaka with infant
And another common brown lemur. I can’t help but anthropomorphise about this picture, that this guy is thinking ‘oh for God’s sake, get on with it, will you?’:
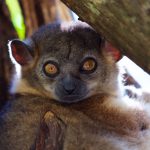
Grumpy common brown lemur
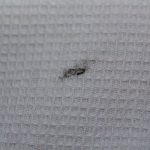
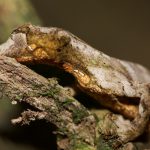
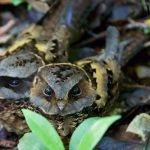
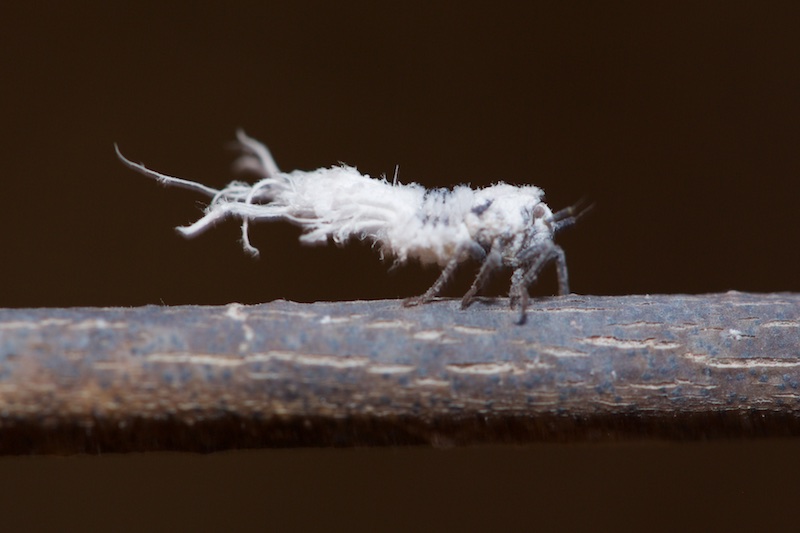
And so we get on to the title of this post: the ‘walking flowers’. I’d been ill for a couple of days by this stage and wasn’t feeling like the sharpest tool in the box. Our guide pointed a plant covered in white flowers and said, ‘have a look at these’. We’d never seen anything like them before and it took a while for me to notice that they were moving:
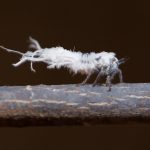
Flower bug
I’m not entirely sure which end is which. Needless to say, you don’t get them anywhere else except Madagascar.
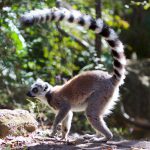
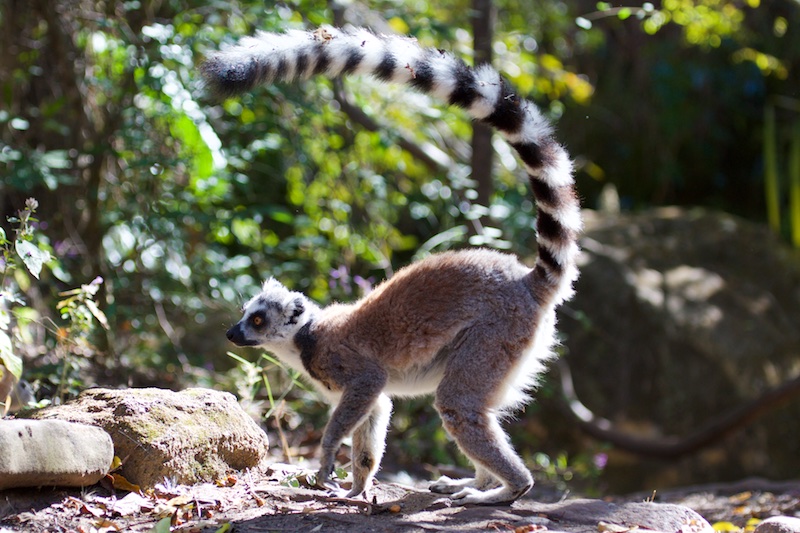
Ring-tailed lemur
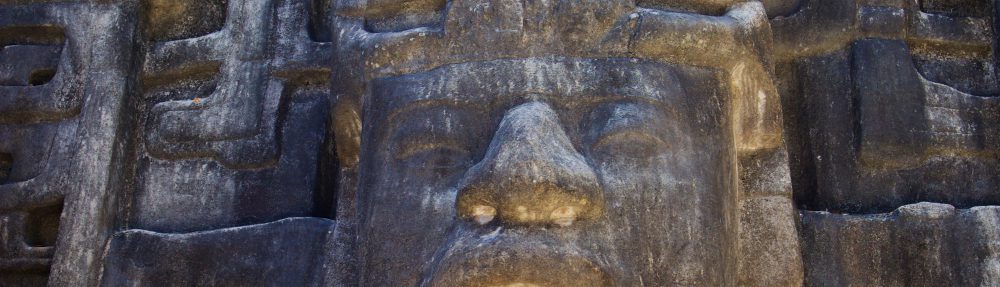
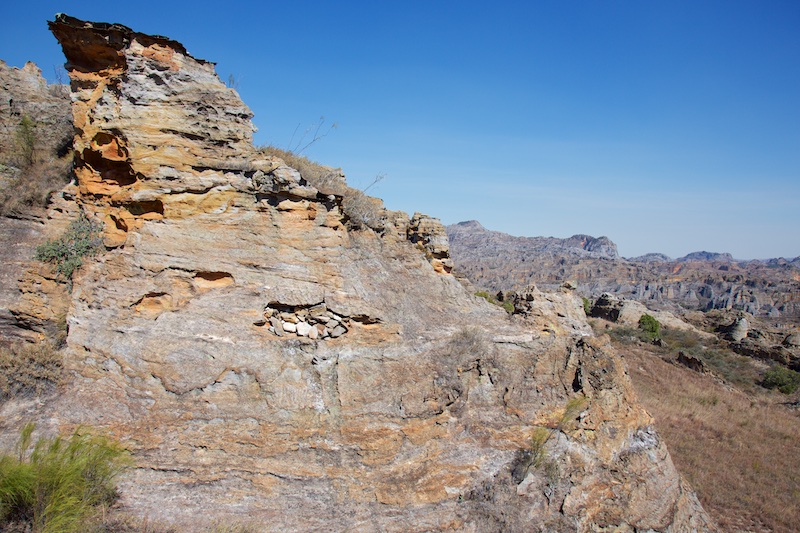
On our last full day we did a fairly long walk in the Namazaha Valley. It was supposed to be a 10km hike but my world was still being metered out in distances between toilets so we foreshortened it to about 6km in the end. Interesting spot, and a classic example of the arid environment in this part of the country.
The stones [centre left] in this picture are covering the entrance to a grave.
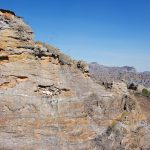
Isalo
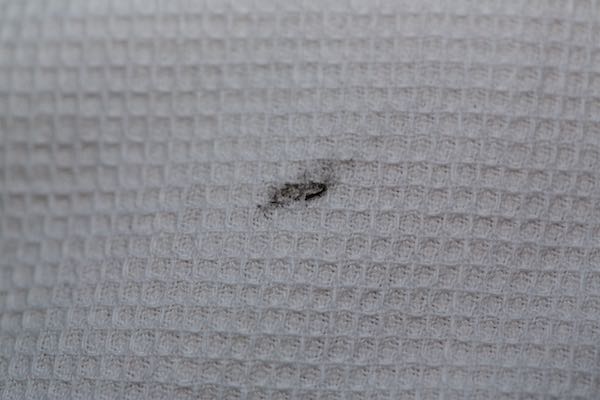
On our last evening in Isalo, I was sitting outside the room when I noticed these weird shaped motes floating in the air. Given the recent experience with the flower bugs, I assumed that they were some sort of whacky insect, until one of them landed on me and I touched it with my finger:
Slash and burn
It’s hardly the most fascinating picture but it was quite a poignant one for me: it’s a piece of ash. ‘Slash and burn’ is a common agricultural technique in the country. We were told a fire got out of control a few years ago: it affected 60% of the Isalo park and killed all but two of the sifakas. You see a lot of fires as you are driving through the countryside.
We visited one other smaller reserve before we moved on, called Zombitse. It was ok: plenty of ring-tailed lemurs and chameleons in the mix but by this stage, unless the lemurs were species we hadn’t seen before or were doing handstands, it was time to move on. Despite the name, there were no zombies.
We had a long drive to our next venue, which was the Ranomafana national park and the Setam Lodge. We passed this along the way. I love this shot, which is pretty much straight out of the camera:
The sky from the start of the Simpsons
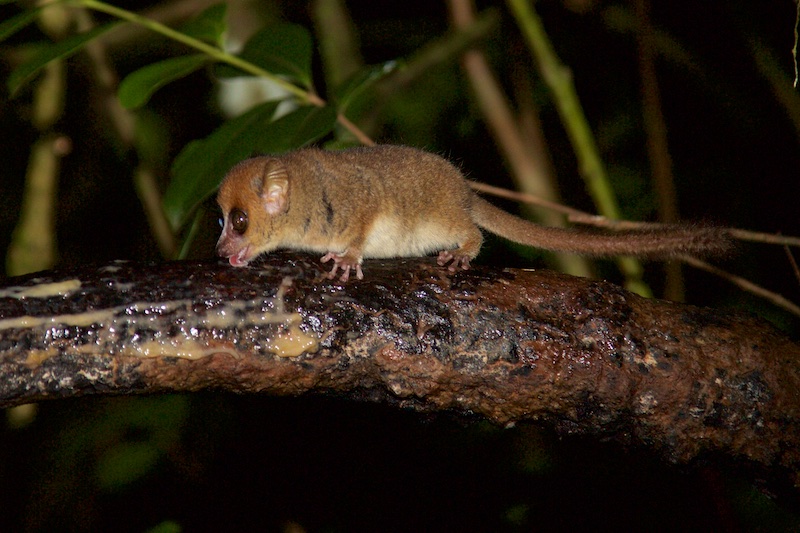
The change in the weather over the course of the day reflected our move out of the arid region and into rainforest. We had a very interesting night walk on the first evening with the highlight being a mouse lemur:
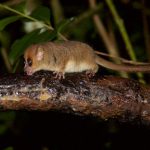
Mouse lemur
The guide got a banana and smeared it over the branch [which is the brown slimy stuff you can see in the shot]. You then hope that the smell attracts a lemur. It took a couple of goes as the first fishing expedition attracted a rat. Being Madagascar, you half expect the rats to have, I don’t know, wings and a handlebar moustache at the very least. Nope: they have plain old rats, just like everywhere else.
Anyway, the mouse lemurs are lightning fast: they run along the branch hoovering up the banana as they go. They are ridiculously cute. These and the bamboo lemurs look like the result of a conversation between a toddler and a cartoonist.
“Bigger eyes.”
“No problem.”
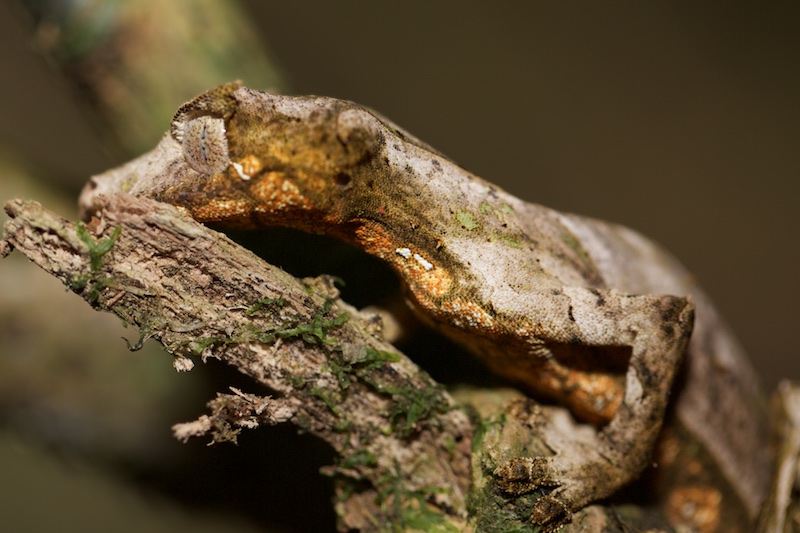
This is a baby long-nosed chameleon. It’s not a great shot but the conditions were pretty difficult: macro depth of field, at night, with the 2 inch long subject on a branch that was moving…
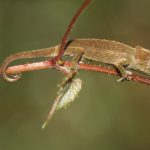
Baby long-nosed chameleon
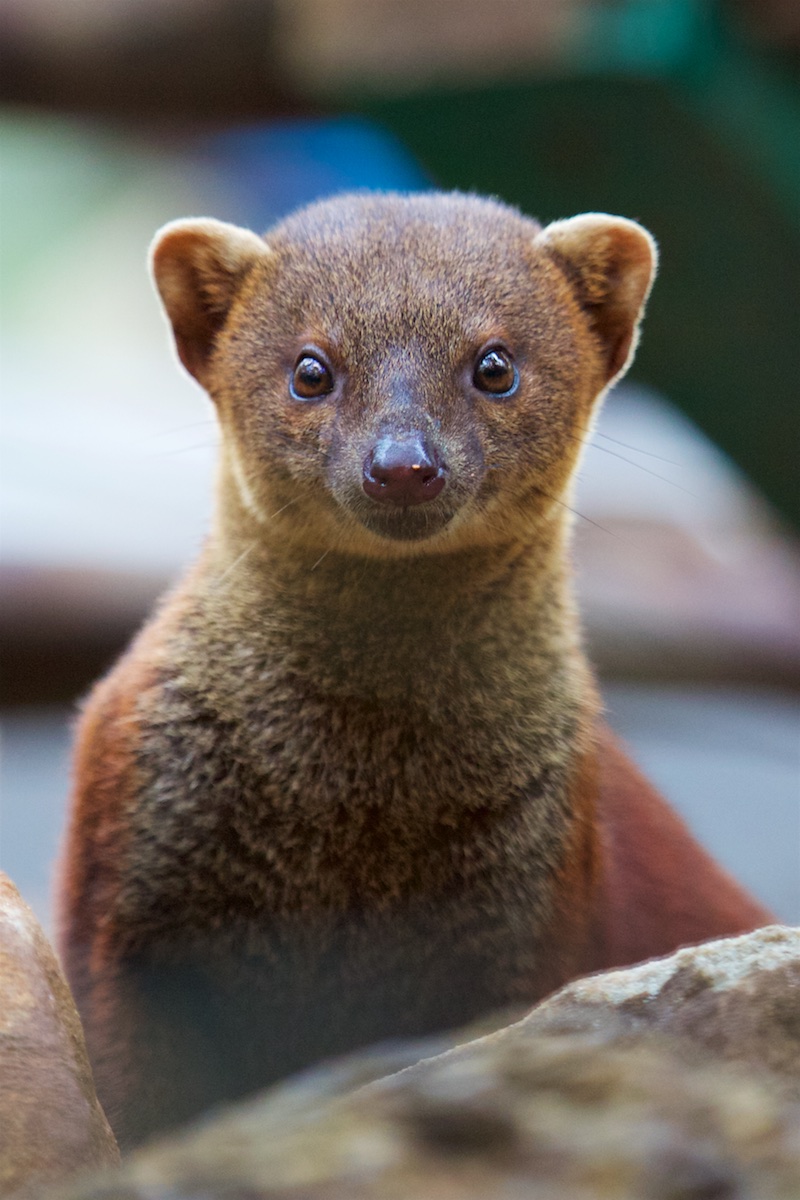
The next day we had our physically toughest hike, which was about 8km over very hilly ground. Just on that point, in our experience I’d say it’s second only to Borneo, in terms of the physical demands of getting around in rainforest. That said, the temperature we had last week was low- to mid 20s. If you were covering the ground that we did in Ranomafana at the height of the summer, you’d have a real slog on your hands.
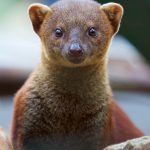
Ring-tailed mongoose
Golden bamboo lemur
Flat-tailed gecko
From Ranomafana we had another long drive to our final venue, which was the Eulophiella Lodge, next to the Andasibe national park. We broke the journey with an overnight stay in a guesthouse called the Maison Tanimanga in Antsirabe. That was notable for what I rated as the best meal of the holiday.
A quick aside about the grub before I get on to Andasibe. It’s French influenced, with every place we stayed in serving baguettes and croissants for breakfast.
- Tulear had pretty decent food, but with the odd ‘miss’: like a zebu carpaccio starter which was frozen.
- Relais de la Reine: very rich food, with lots of creamy sauces.
- Setam Lodge: I’ve no idea. I was in full-on emergency mode and had boiled rice and vegetables for the entirety.
- Maison Tanimanga: fabulous home-cooked French food.
- Eulophiella: slightly simpler fare but still very nice.
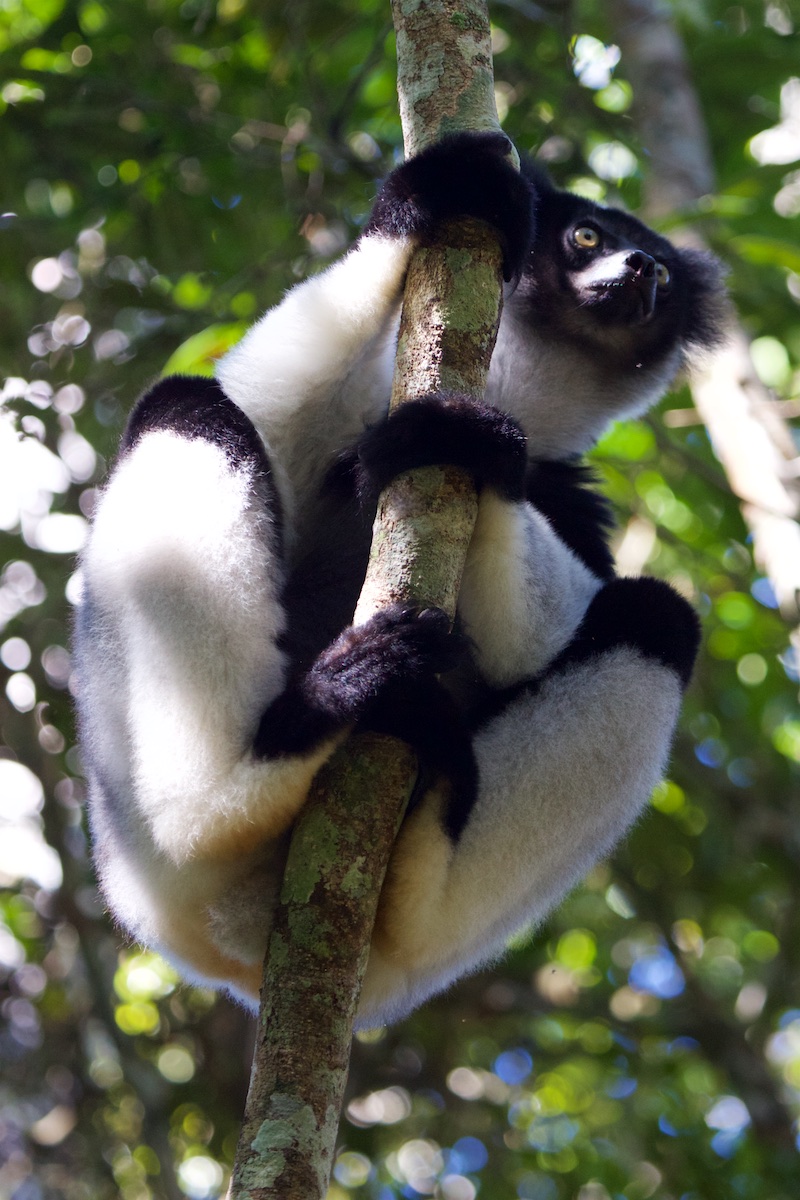
Andasibe was the coldest of the places that we stayed, with the temperature down to 11C at night. I enjoyed this park the best, I think: it was slightly easier going and there was a fantastic variety of wildlife.
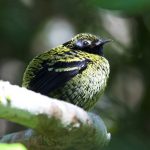
Velvet amity [I think]
Indri
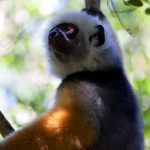
Diademed sifaka
Nightjar [breeding pair – sleeping]
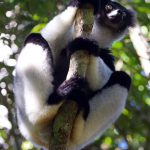
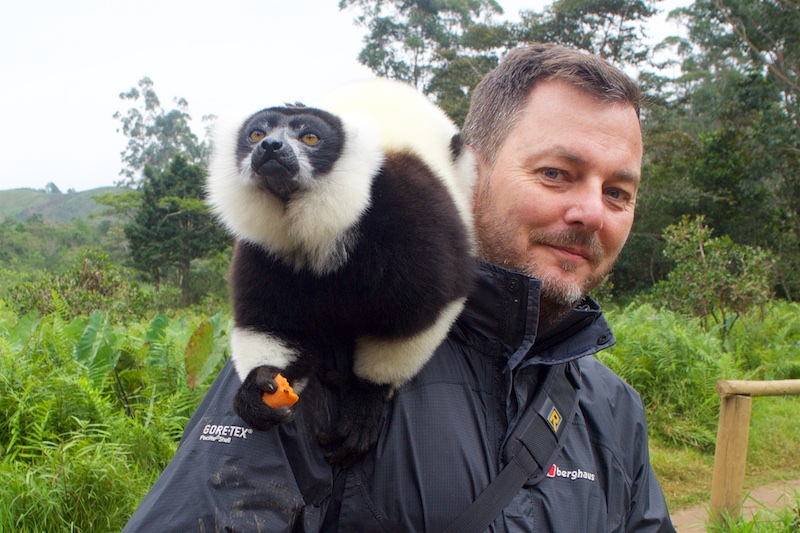
The last place we visited of note, which was on our way back to Tana was ‘Lemur Island’. It’s basically a mini-zoo built into the grounds of one of the fancier lodges in Antsirabe. Our guide was pretty diplomatic about it: it’s a for-profit affair, and the lemurs that are kept there don’t get rotated back into the wild. That said, where else in the world are you going to have a lemur jump on your head? They have 4 species: black and white ruffed, ring-tailed, common brown and bamboo. The ruffed and common brown like to get up close and personal, and the ruffed have particularly luxuriant fur. Once again, being out of season, we had the place to ourselves.

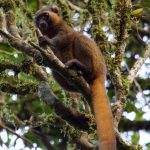
Golden bamboo lemur
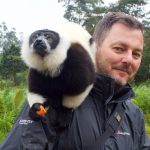
Black and white ruffed lemur, and me. I’m on the right.
So that was our fortnight in Madagascar, and it really is an extraordinary place. You’ve got to hand it to that Attenborough fella: he really knows his onions.


