Giant’s Causeway Trip

We were at a wedding last weekend in North Antrim. It’s a part of the world that I’ve been to many times by virtue of having family in Ballycastle [same connection that was getting married in fact]. It’s a lovely part of the world: anyone planning a trip to Ireland who doesn’t incorporate a drive along the Causeway coastline is missing a treat.

I took about 300 pictures at the wedding and reception the day before we went down to the Causeway. I had my best results of the day bouncing the flash for a few outside shots to get some fill and catchlights. I didn’t do any adjustment to the exposure settings, just did a half click in aperture priority mode, and then hit the button to pop up my on-camera flash. I achieved some very intersting effects on a day where there was quite a lot of cloud cover, but still more than bright enough to operate without the flash.

I’ve only started playing with the flash,  i.e., not shooting on full auto, in the last couple of months or so. Beyond studio work, mastering a flash has got to be the most technically demanding part of photography. As a consequence, it’s something that I’ve started to try as I’ve gained in confidence in other areas.

I also took quite a lot of indoor shots using the same technique. Starting at the classic setting of 1/60 second at F8, I tried various aperture and shutter speed settings to see what sort of effects I could get. I got some interesting shutter drag effects but it was a pretty hit and miss affair, with the results tailing off towards the end of the night as the beer started to take its toll :).

Final thought on the flash: I’ve pretty much made up my mind to take the plunge at the end of the year and buy a 430 EX II.

On to the Causeway itself, our second World Heritage site in less than two weeks. There were a couple of limiting factors, starting with equipment. It’s the sort of venue that is crying out for a tripod. Given the high contrast range between the rock formations and the sky, it would be a really good candidate for bracketing and HDR. Also, as it can be quite busy, a number of layered exposures would probably give you the option to delete people from the finished scene. But we were on a long weekend break and flying with a low cost airline [carry-on luggage only], so the tripod stayed firmly at home.

The other limitation was a hangover of epic proportions: one of those real humdingers that looms over you making fizzing and spitting noises.

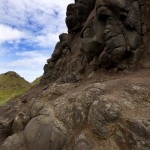
Anyway, I’d decided in advance [of the trip, rather than the hangover] that I wanted to push my 10-22, with quite close-up foregrounds, and long depth of field settings. This first shot is pretty much straight out of the camera, just with some increased saturation, imperceptible dodging and burning on the rocks, and a little bit of levels adjustment on the sky:

1/100sec at F11, ISO 200 at 10mm

1/100sec at F11, ISO 200 at 10mm

The picture that I’m most pleased with, and the one that I’ve spent more time on in post than any picture I’ve ever taken [about 6 hours I reckon] was this one. Here’s the ‘before’ shot, straight out of the camera:

1/60sec at F18, ISO 500 at 10mm [Before]

1/60sec at F18, ISO 500 at 10mm - Before

So it’s that standard washed out look that you get with RAW. I quite like the composition [even if it hasn’t got an awful lot to do with the rule of thirds], but the obvious problem is with the the sky. I used evaluative metering, and with the predominantly dark rock formations in the foreground, the sky is completely burnt out. There is also some chromatic aberration, which it’s hard to criticise the lens optical quality for, given the very high contrast.

The first couple of hours that I spent working on the image was trying to add a sepia tint and some vignetting, for no reason other than I thought it would rescue the shot. Although I found some good tutorials on this, the results were still pretty disappointing, basically because the contrast of the sky was completely out of balance with the effects that I was applying.

So I moved on to trying to replace the sky completely from a different shot. The easiest way of doing this is with magic wand tool. I have never managed to get any decent results with this tool, and to be fair, the fringing around the mountain didn’t give it much to work with this time.

What took me the most time was getting my head around what I really needed to do, which was to use a masking layer. I’ve worked my way through a few tutorials on this in the past, but never really got it. I’ve said before: despite working in IT for my entire career, I find Photoshop [and Elements at that] pretty tricky to use. Anyway, I persevered this time, starting by moving a strip of sky into the background layer from another image. Next I created a levels adjustment layer, then combined this with the ‘sky’ layer. I then painted the foreground covered by the ‘new sky’ out back in, using a softer and more opaque brush as I approached the edge of the rock formation and mountain.

It’s not perfect by any stretch, but it’s a fair improvement on the original shot:

1/60sec at F18, ISO 500 at 10mm [After]

1/60sec at F18, ISO 500 at 10mm - After

With the benefit of hindsight, I’ve replaced something that’s completely overexposed with sky that’s just moderately over-exposed. But I’ve reached a tipping point with this particular shot: the results as they stand are reasonably satisfactory, and I’m not convinced that the raw material in the original composition warrants starting from scratch. Interesting exercise though.
What Have the Romans Ever Done For Us?

Just back from a week in Italy, a destination that we have postponed for various reasons for about the last three years. We have managed to have some complicated travel over the last few holidays, and this trip managed to conjure another splendid delay on the outbound leg, with a four hour queue at check-in. It’s either a feature of my age or my profession [IT in the financial sector] that I find these types of delay, and then workaround, absolutely infuriating. I understand perfectly why the UK’s third biggest airline doesn’t design high availability into their systems: cost. No matter that they annoy a few thousand cattle one Friday afternoon; the next day they are replaced by ones who look pretty much the same. I won’t fly with these guys again, but I know that it’s just as likely to happen with any other carrier. Oh, and the ‘workaround’: tell the people queuing nothing, and staff 3 out of a possible 15 or so check-in desks…

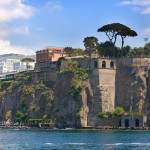
Anyway, we stayed in a clifftop hotel call the Grand Ambasciatori in Sorrento and it was fantastic: just the right balance between friendly and smart.

1/125sec at F10, ISO 100 at 55mm

1/125sec at F10, ISO 100 at 55mm

Couple of unexpected features of the hotel that neither of us had encountered before: having to pay for the room safe [it needed a key], and getting one little bottle of shampoo and shower gel that is your allocation for the week.

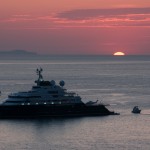
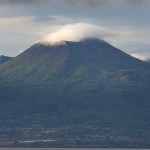
We had this bruiser docked in the bay right in front of the hotel for the first couple of nights:

1/100sec at F4.5, ISO 100 at 98mm

1/100sec at F4.5, ISO 100 at 98mm

It’s called the Octopus, and belongs to Paul Allen, Microsoft co-founder.

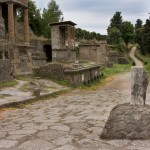
We had a couple of interesting daytrips, first out to Pompeii. The most immediately striking aspect of the place, for me, was that it’s massive. I’d not really thought about it in advance but assumed that it would be over a few acres. Care of MotionX GPS – actually an approximation, as it eats the battery of my iPhone – I figure we walked around 7 miles over the course of 4 hours. It is just an astonishing place to visit: it is a simply staggeringly vivid piece of history:

1/160sec at F8, ISO 200 at 24mm

1/160sec at F8, ISO 200 at 24mm

1/100sec at F4, ISO 500 at 67mm

1/100sec at F4, ISO 500 at 67mm

I remember a picture of this dog from a history book from grammar school:

1/125sec at F5.6, ISO 100 at 24mm

1/125sec at F5.6, ISO 100 at 24mm

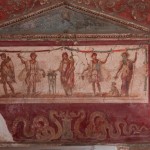
This is typical of the technology that the Romans routinely used: this lady seems to have lost one of her contact lenses, much to the puzzlement of her male friend:

1/125sec at F4, ISO 500 at 93mm

1/125sec at F4, ISO 500 at 93mm

The second of our daytrips was to Capri. I have to admit that I didn’t know anything about the island before the holiday. It’s a beautiful place, and very, very expensive. The standout for us wasn’t the place but the ferry crossing there: I’m Irish and way back in the 80s, and long before the advent of cut-price flights, I had a few hairy ferry journeys to and from home when I was at college. None of them came close. And it wasn’t just me being a wuss: my wife still has bruises on her arms where she was holding onto the rail at the back of the boat to stay in her seat.

1/125sec at F10, ISO 100 at 24mm

1/125sec at F10, ISO 100 at 24mm

From a photographic perspective, I’ve noticed that, for a holiday like the one we’ve just been on, I could have got away with leaving 3 of my 4 lenses at home. I didn’t take one decent shot with my long lens, there were no very low light situations to justify taking my 50mm, and nothing worth breaking out my 10-22mm for. Apart from circumstance [e.g., no wildlife to warrant the 100-400], I think this is in part to do with my accommodating the exceptional quality of the 24-105. The more I use it the more it impresses me.

My eBook reader was fantastic. I read 2 1/2 books over the course of the week, and used a 1/4 of the battery.

I haven’t really mentioned Sorrento itself: birthplace of cannelloni, cliffside resort, and just a lovely town. Neither my wife or I had been to Italy before and we were both massively impressed. The food was fabulous, the people were friendly, and the parking of cars was more like abandonment :).

1/125sec at F16, ISO 200 at 28mm

1/125sec at F16, ISO 200 at 28mm

1/125sec at F6.3, ISO 100 at 180mm

1/125sec at F6.3, ISO 100 at 180mm

Darkening the Sky

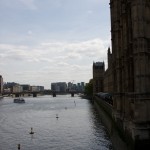
We had a trip to London over the bank holiday weekend, and I’ve been using some of the simpler methods available in PhotoShop [Elements] to make the images a little more punchy. Previously I’d been using layers to adjust the contrast in a specific area of the picture, but I found an online tutorial which uses a much simpler approach: select, feather and then use CMD [Mac] or CTRL [PC] and ‘L’ to bring up the levels editor. The results are quite dramatic. The first image is straight out of the camera:

1/125sec at f14, ISO 100 at 24mm

1/125sec at f14, ISO 100 at 24mm

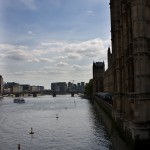
The next is the same shot but with the levels adjustment:

1/125sec at f14, ISO 100 at 24mm

1/125sec at f14, ISO 100 at 24mm

I’ve actually used three of separate selections: before I worked on the sky I lightened the parliament building, with quite a low feather setting. Then I did two separate selections on the sky: the first was everything, which I darkened. At this stage it looked a lot better, but the lower half, where the clouds are quite packed, was still a little light, so I pushed this a bit more with a final selection.

I’ve taken a couple of bites to get this as it appears in the second shot. The first attempt was creating a halo around the building, where I was doing the lightening with too high a feathering. The top of the futhest tower of the parliament building is caught in the crossfire of the darkening, but I think the overall result is quite pleasing. There’s not really enough happening, especially in the foreground, to make it a terribly interesting shot, but the takeaway is that I’m going to add this to the list of techniques I’ll routinely apply to my outdoor shots.