Bedside Pi: Hue Light Controller with 7″ Touchscreen

A couple of years ago, I built a little Kubernetes cluster using 4 Raspberry Pis. While I learned tons about K8s doing it, the cluster wasn’t reliable over the longer term. I only budgeted for one SSD (for the cluster master), and the SD cards in the other 3 Pis started to become unreliable after a few months. While I started cannibalising some of the hardware, the Pis themselves were gathering dust. Well, only 3 of them are now…

I bought a 7″ touchscreen (which seem to be in very short supply at the moment), and paired it with the matching enclosure which is linked to on the official site. I decided that I wouldn’t try to design my own model for 3D printing, having made a bit of a mess of it the first time round.

I’ve spent the last few evenings writing some code for it based around the CustomTkInter library, which is really nice. The ability to put things on the event loop using .after() is perfect for light control – e.g., polling the light state every 10 seconds to check for something other than the UI having switched them on or off.

I repurposed the same code I used for the eInk display to have persistent access to Google Calendar. I’ve not seen this widely documented but it’s pretty straightforward:

  • Create a project in the Google Console.
  • Create a service account
  • Export the private key of the service account. Given my day job, I feel obliged to say this is not good practice, but the alternatives rely on using some industrial authentication infrastructure which really isn’t going to be a whole lot of fun to run at home.
  • Add the service account to have access to your calendar.

While my choice of RSS feeds and button names is unlikely to be wildly interesting, the code is here.

Livesets using Tone Studio with the GT-1000 Core

“I read it on the Internet so it must be true” warning: I’ve had the GT-1000 for 5 months. I don’t claim to be an expert. I’m documenting this because I wasn’t able to find a concise explanation of it. As far as I know, what I’ve explained is correct. It works for me, but be cautious if your custom patches are of value to you.

TL;DR

I had two assumptions about how this stuff works, and both were wrong:

  • First, that exporting a liveset to the pedal would overwrite everything in the User list. It doesn’t: if your set has say 5 patches, they are simply copied to slots U001 – U005, overwriting whatever was there before.
  • Secondly, that if you wanted to restore whatever was originally in the User list, you could just copy from the Presets. You can’t in the Librarian (I’ll come back to this).

User Patch Backup and Starting State

Before you do anything else, create a liveset which is a backup of all of the out-of-the-box User patches. Use the shift key for multi-select.

I’m now going to immediately contradict this, in the context of how to restore the User patches to the starting condition (without a reset). It’s useful to have the pristine copy of everything – and copying from this list to other livesets is quicker than copying over USB from the User list on the pedal – but in reality I don’t anticipate I’ll ever want to write the full list back. So I’ve also created an ‘Original First Five’ list which allows me to get back to square one: your mileage may vary on the maximum size you want to use. Five is fine for me. This approach will make sense when we start switching between livesets.

Starting state

Let’s now create a test liveset from a random selection of patches:

Test liveset…

We now hit the export button in the top right, and select the pedal:

Export….

…and we overwrite the original User presets in U001 – U005. U001 was Premium Drive, and now…

First 5 User presets match the test liveset

And finally, to get back to Square One, I’ll export my ‘Original First Five’ back to the pedal:

Back to starting state…

It is possible to ‘restore’ from the Presets list in the Editor: if you just toggle the FX1 button (twice to its original state), the Write option becomes available. But this would be pretty tedious to do one at a time.

Fitting a Mastery Bridge to an American Pro Jaguar

I bought a Mastery M1 to replace the stock Fender bridge on my 2017 Jaguar during the week. I asked at a store to double check that it was compatible – I wasn’t sure if I needed the kit, including the thimbles – and was told it was.

I then found that the posts on the Mastery were too wide, by about a millimetre or so.

I searched everywhere online to try to figure out what I needed to do to fit the thing. I was hoping that it would be something that I could do myself, but I really didn’t want to tackle anything that was irreversible.

I couldn’t find anything specific to the American Pro, which is why I’m writing this up, on the off chance that Google lands someone else here who is thinking of doing the same thing.

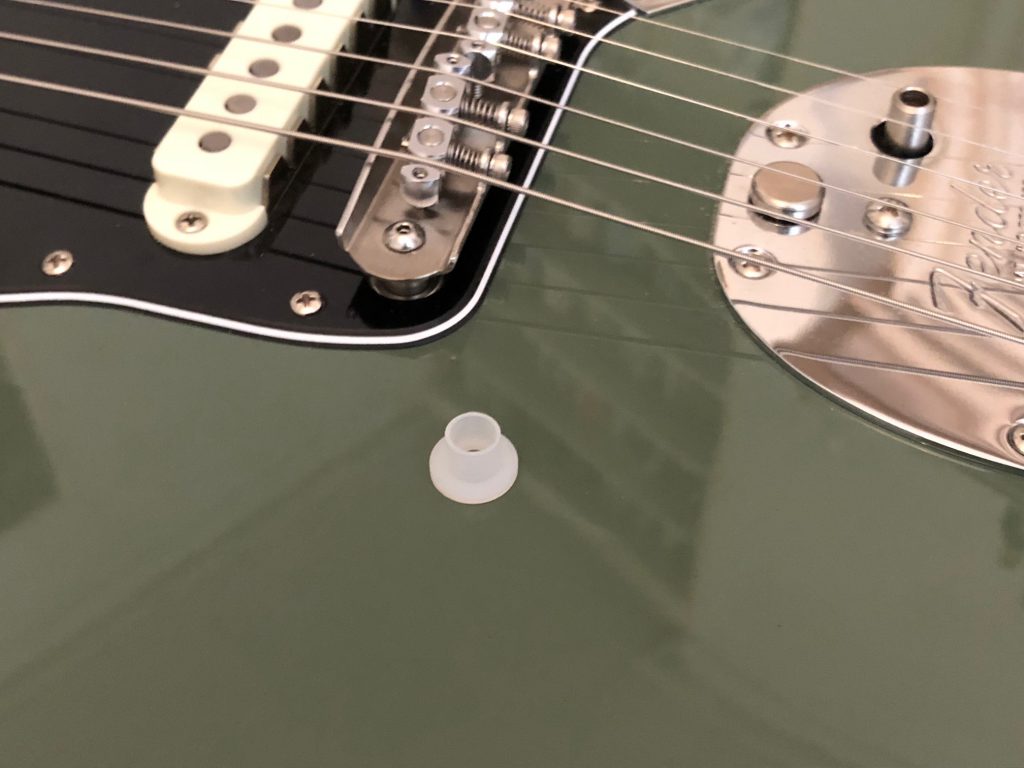
Long and short of it, it’s a doddle. The plastic mountings [thimbles?] that the stock bridge fits into are less than a centimetre deep. I very carefully levered them out of the metal fittings they are inserted into using one of the Allen keys that came with the Mastery. As I couldn’t tell the dimensions of them before I started, I initially thought I’d have to take them out and replace them with the Mastery thimbles.

You don’t need the Mastery thimbles.The M1 fits perfectly on its own.

Here’s a quick snap showing the little mounting that I removed:

American Pro Jag with Mastery M1 Bridge